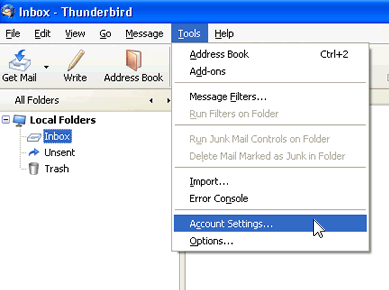
1. Under the 'Tools' drop-down menu click on 'Account Settings'
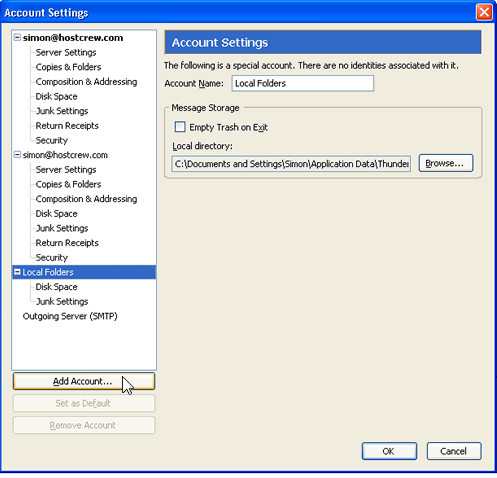
2. In the 'Account Settings' window click on 'Add Account'
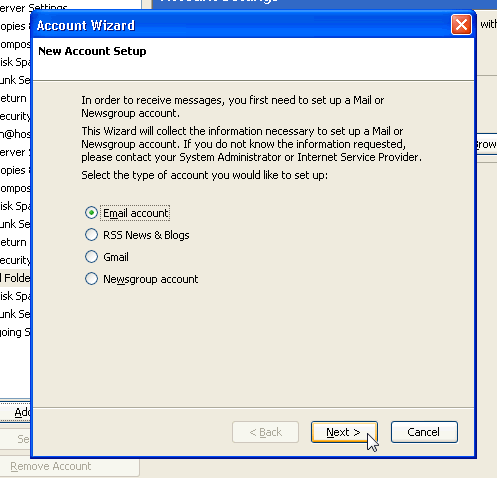
3. In the 'Account Wizard' window choose the radio button for 'Email Account' and click 'Next'
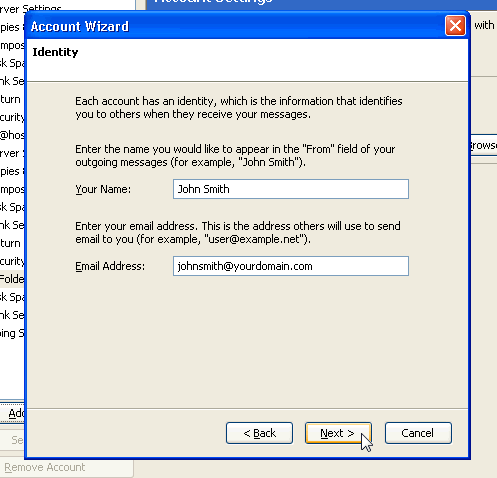
4. Choose a name for the account. The name will appear in the "From" field for all your outgoing emails. Choose the email for this account and click 'Next'
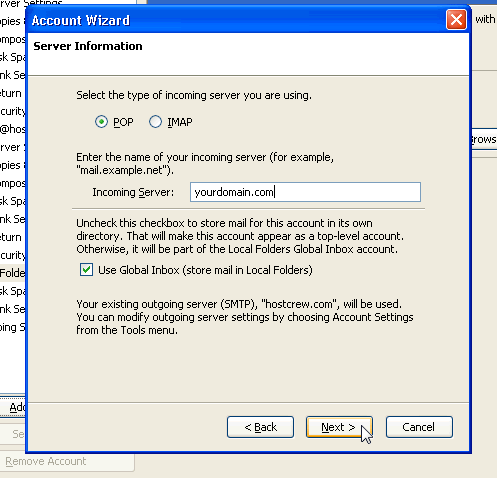
5. Under the 'Select the type of incoming server you are using' section choose 'POP'. The incoming server will be your domain name, example; yourdomain.com or mail.yourdomain.com. Check the box for 'Use Global Inbox' and click 'Next'
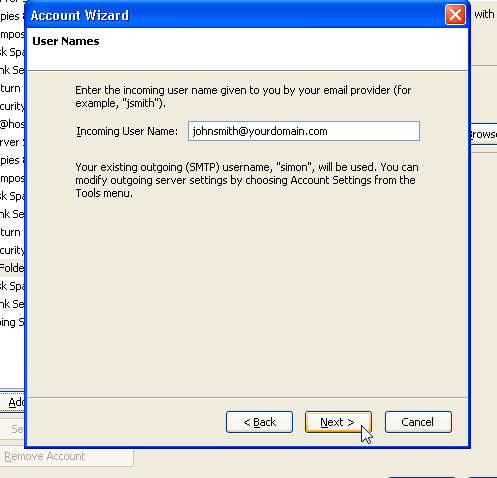
6. Enter your username for this email account, the username is usually the email address you are setting up. Click 'Next'
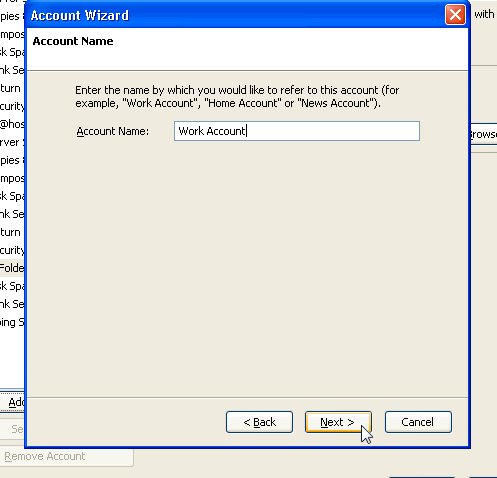
7. Choose an account name, i.e: Work Account, Home Account.... Click 'Next'
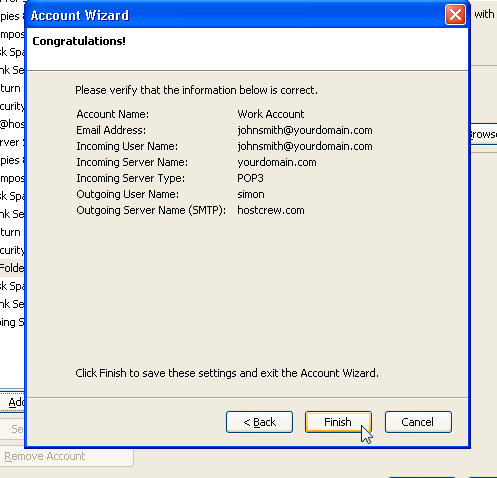
8. Verify all information is correct and clck ' Finish'
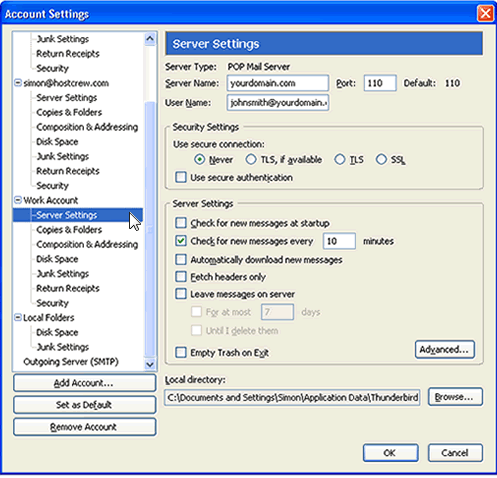
9. You may need to update your server settings by clicking on 'Server Settings' under the email account you just created in the 'Account Settings' window. Make sure the 'Server Type' is POP mail server, 'Server Name' is your domain name, 'Port' is 110 and "User Name' is you email address. Make sure 'Use secure connection' is set to 'Never'. Uncheck the check-box that reads 'Leave messages on server' . Note: If you are using a blackberry to receive e-mails then you should check the check-box that reads 'Leave messages on server' but also check the box 'For at most'. If you are receiving a large number of emails then you should choose no more then '5' days for this option. Go to next step befor clicking 'OK'.
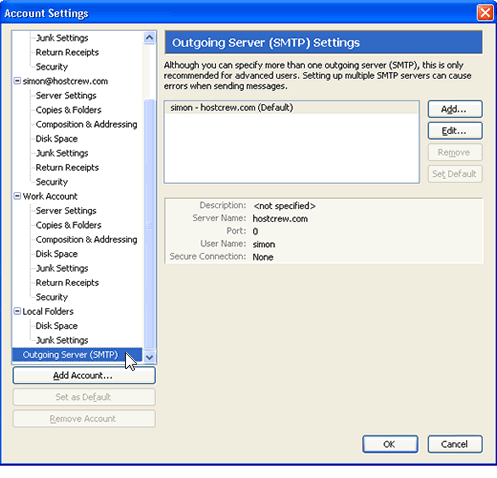
10. In the 'Account Settings' window scroll down and click on 'Outgoing Server (SMTP)'. Click 'Add' at top right.
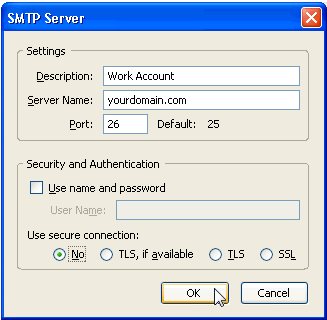
11. Choose a description for the account, i.e; Work Account... 'Sever Name' should be set with your domain name. 'Port' number should be set to 26, Uncheck 'Use name and password', select 'No' under 'Use secure connecion' and click 'OK'
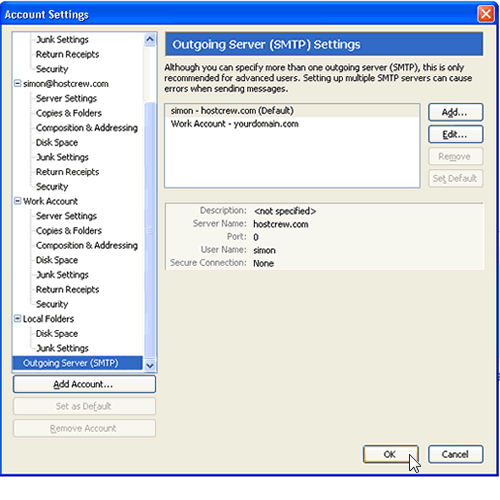
12. Click 'OK' and your done!
- 0 Users Found This Useful

