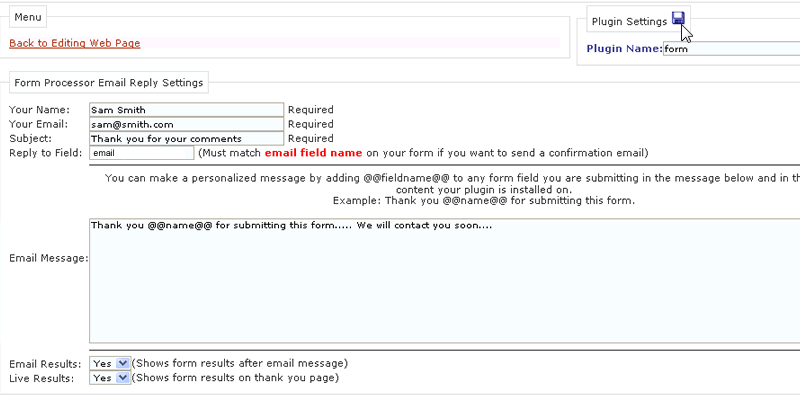
1. At the Form Processor plugin home. Enter 'Your Name', 'Your Email', 'Subject' (this will be used for the email sent to you and the user), 'Reply to Field' (This must match the "email" field name on the form itslef; descriped in detail later) and your 'Email Message' (This will be the message sent to the user). Click on the ![]() icon to save this information.
icon to save this information.
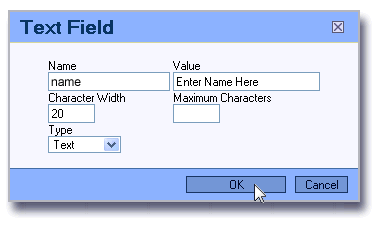
2. To add a form object to your form page click on a form object in the tools section of the web page content section. Here we are adding a text field for a name....
3. After we click on the 'Text Field' button we get a pop-up. Here you can enter a 'Form Name', 'Value', Character Width' and so on. The form name is what we can use to personalize our emails. For example: we can put "@@name@@" inside the email message (in step 1) and this will use the customers name in the email. The 'Value' is only used to describe what you want the customer to do with this text field. 
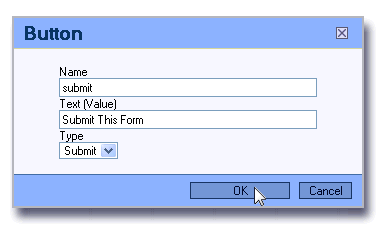
4. Here we are adding a submit button to our form. The 'Text(value)' is the text that will be on the actual button.
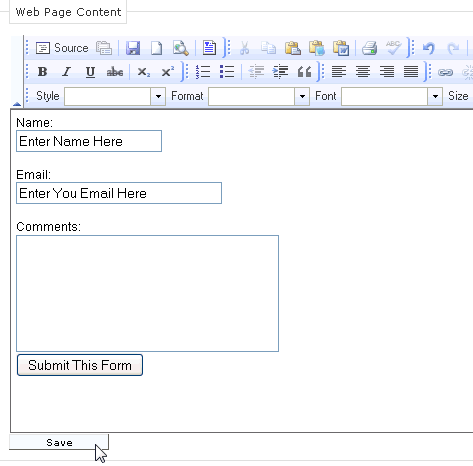
5. So far here is what our form looks like. We have a name, email, comments section and a submit button. If the field name for the email text field matches the 'Reply to Field' in the configuration the customer will recieve an email. You can add as many form fields as you need. 
6. Click Save and you form will be live on the net!
- 0 Users Found This Useful

